
.
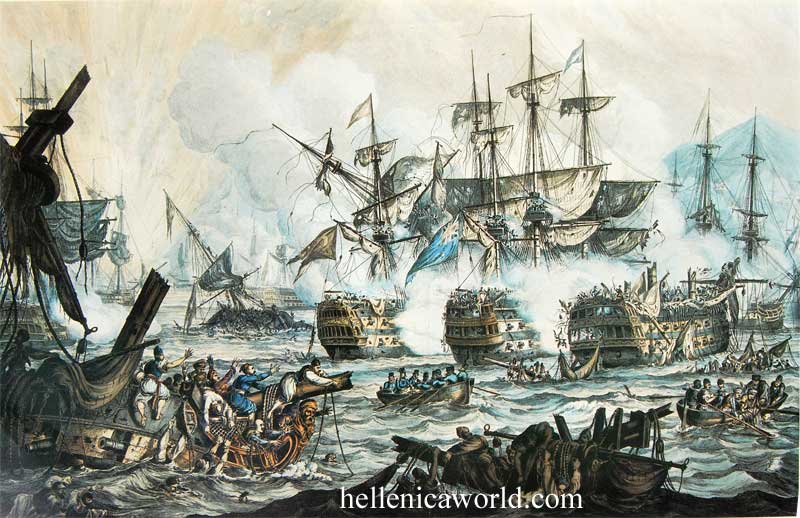
Battle of Navarino, National Historical Museum of Athens
The naval Battle of Navarino was fought on 20 October 1827, during the Greek War of Independence (1821–32), in Navarino Bay (modern-day Pylos), on the west coast of the Peloponnese peninsula, in the Ionian Sea.
An Ottoman armada, which, in addition to imperial warships, included squadrons from the eyalets (provinces) of Egypt, Tunis and Algiers, was destroyed by an Allied force of British, French and Russian vessels. It was the last major naval battle in history to be fought entirely with sailing ships, although most ships fought at anchor. The Allies' victory was achieved through superior firepower and gunnery.
The central factor which precipitated the intervention of the three Great Powers in the Greek conflict were the Russian Empire's ambitions to expand in the Black Sea region at the expense of the Ottoman Empire and Russian emotional support for the fellow-Orthodox Christian Greeks, who had rebelled against their Ottoman overlords in 1821. Russia's intentions in the region were seen as a major geostrategic threat by the other European powers, which feared the disintegration of the Ottoman empire and the establishment of Russian hegemony in the Balkans and the Near East. This induced Great Britain and France to bind Russia in a joint intervention to secure Greek autonomy in a manner which preserved Ottoman territorial integrity.
The Powers agreed, by the Treaty of London (1827), to force the Ottoman government to grant the Greeks autonomy within the empire and despatched naval squadrons to the eastern Mediterranean Sea to enforce their policy. The naval battle happened more by accident than by design as a result of a manoeuvre by the Allied commander-in-chief, Admiral Edward Codrington, aimed at coercing the Ottoman commander to obey Allied instructions.
The sinking of the Ottomans' Mediterranean fleet saved the fledgling Greek Republic from collapse. But it required two more military interventions, by Russia in the form of the Russo-Turkish War of 1828-9 and by a French expeditionary force to the Peloponnese to force the withdrawal of Ottoman forces from central and southern Greece and to secure Greek independence.
Background
Map of Europe in 1815, after the end of the Napoleonic Wars. Note that since its apogee in the 17th century, the Ottoman empire had lost Greater Hungary (including Transylvania) to the Austrian Empire and the whole of the region North of the Black sea and Caucasus to the Russian empire. (The map erroneously fails to show that Mesopotamia and the whole of North Africa as far as the Strait of Gibraltar was still under Ottoman suzerainty at this time)
The Ottoman empire
The Ottomans had conquered the old Greek-controlled Byzantine empire during the late Middle Ages, taking over its territory and its capital, Constantinople, and becoming its effective successor-state.[6] Ethnic Turks were the "master-nation" of the empire, holding political and military power, but were a minority of the empire's population, even of its Muslim population (as they were outnumbered by their Arab subjects). Although officially Islamic, its Christian inhabitants (Greek, Balkan, Armenian and Christian Arab) represented roughly half the total population. Although granted freedom of worship and generally better treated than non-Christians in most European countries, non-Muslims in the Ottoman empire were subject to heavy discriminatory obligations. They were required, in accordance with Islamic Law, to pay a special poll tax, the jizya, which in times of poor harvests could be a crippling burden on mainly subsistence-level peasants. Under the hated devşirme (military levy system), Christian communities were also forced to surrender 1 in 5 infant boys of each annual class to the Ottoman military (the finest physical specimens being selected by the recruiting-sergeants). These would be permanently separated from their families, and moved to military orphanages, where they were raised as Muslims and trained as warriors. When they reached adulthood, they were recruited to the finest regiments of the Ottoman army, especially the elite Janissary corps (from Turkish yeniçeri = "new soldier").
The Ottoman empire had once been the foremost military power in Europe, reaching its apogee in the 16th and 17th centuries, when it posed a serious threat to Christian Europe. Its armies overran the entire Balkan peninsula and Greece, and reached the borders of Austria, laying siege to Vienna twice (in 1529 and 1683). Its fleets dominated the Mediterranean sea. However the Ottomans had gradually fallen behind the other European powers as they failed to modernise their political institutions, economic system and military forces. During the 18th century, the Ottoman Empire steadily lost territory in eastern Europe to the neighbouring Austrian and Russian empires (which annexed Hungary and southern Russia respectively).
By the start of the 19th century, the Ottoman Empire was the most economically backward and militarily weak of the great powers. But its territory, even after the continuous retreats, remained vast and strategic: it encompassed the Balkans, Anatolia, and all the Arab lands from Persia to Morocco. The latter were seen by London as having crucial geo-strategic significance as they constituted the link between the Mediterranean and Britain's empire in India.
The Greek revolt
Muhammad Ali Pasha, Ottoman wali (governor) of Egypt 1805-49, whose expedition to the Peloponnese precipitated Great Power intervention in the Greek conflict. An ethnic Albanian, he was born in 1769 in Kavalla, Thrace, the son of the Ottoman district's military commander. At the head of an Ottoman army, he fought against the French under Napoleon Bonaparte during their invasion of Egypt in 1798. After the French withdrew in 1801, he established himself as de facto ruler of the country by a combination of guile and ruthlessness. His rule saw the first industrialisation of Egypt and the establishment of a modern army and navy. His long-term aim was to carve an empire for himself and his successors out of the ruins of the Ottoman empire. Ultimately, he had to content himself with just the hereditary rule of Egypt. He founded the dynasty which ruled Egypt until the nationalist-military coup of 1952
In 1821, Greek nationalists in the Romanian Principalities and in the Peloponnese and the Aegean islands, launched a series of uprisings against the Ottoman empire, aiming to liberate ethnic Greeks from four centuries of Ottoman rule (see Greek War of Independence). The Ottoman government, known as "the Porte" in European diplomacy (from the French name - la Sublime Porte - for the gate of the imperial palace through which foreign envoys were admitted), responded with a determined effort to defeat the rebellion. For the Ottoman government, Greece was a core province. Its loss could not be contemplated, unlike other regions such as the Romanian Principalities and Serbia, which were considered peripheral vassal-states. The fear of the Ottoman Sultan, Mahmud II (ruled 1808-39), was that the secession of even a small part of Greece such as the Peloponnese would lead to demands by Greek nationalists for the liberation of all the other regions of the empire containing Greek majorities, including central Greece, Macedonia, Thrace, Constantinople itself, western Anatolia, the Aegean islands and Crete and Cyprus, threatening the empire's very existence. In addition, the Greeks were economically critical, as they dominated the empire's trade through their ownership of much of its merchant shipping. On a personal level, Mahmud considered the Greek revolt a monstrous betrayal by a conquered nation that had always been treated generously by the Porte. The Sultan vented his fury on the ethnarch and spiritual leader of the Greeks, the Orthodox Patriarch of Constantinople, Gregory V, whom he suspected of colluding with the rebels. As the Patriarch emerged from his cathedral, in full regalia, after celebrating Easter Mass in April 1821, he was seized by Janissaries and hanged on the spot, from the cathedral gates. After being left to dangle in public for three days, his corpse was dragged through the streets and flung into the Bosporus.
Fighting raged for several years but by 1825, a stalemate had developed, with the Greeks unable to drive the Ottomans out of most of Greece, but the Ottomans unable to crush the revolt definitively.
However, in 1825, the Sultan succeeded in breaking the stalemate. He persuaded his powerful wali (viceroy) of Egypt, Muhammad Ali Pasha (ruled 1805-49), who was technically his vassal but in practice autonomous, to deploy his Western-trained and equipped army and navy against the Greeks. In return, the Sultan promised to grant the rebel heartland, the Peloponnese, as a hereditary fief to Ali's adopted son, Ibrahim. In February 1825, Ibrahim led an expeditionary force of 16,000 into the Peloponnese, and soon overran its western part; he failed, however, to take the eastern section, where the rebel government was based (at Nafplion). Ibrahim's forces then moved onto the Greek mainland, capturing, despite a heroic Greek defence, the pivotal stronghold of Missolonghi in April 1826.[7] In response to Greek guerrilla attacks on his forces in the Peloponnese, Ibrahim launched a scorched earth campaign which threatened the population with starvation and deported many civilians into slavery in Egypt. He also brought in Arab settlers, allegedly aiming ultimately to replace the Greek population.
The Greek revolutionaries, whose motto was ελευθερία ή θάνατος (eleftheria i thanatos: "freedom or death"), remained defiant, and provided their forces with much-needed professional leadership by appointing experienced philhellenic British and French officers to command them: Maj Sir Richard Church (C-in-C) and Col C. Fabvier (land); Adm Lord Cochrane (C-in-C) and Capt F.A. Hastings (sea).[8] By this time however, the Greek provisional government's land and sea forces were far inferior to those of the Ottomans and Egyptians: in 1827, Greek regular troops numbered less than 5,000, compared to 25,000 Ottomans in central Greece and 15,000 Egyptians in the Peloponnese. Also, the Greek government was virtually bankrupt. Many of the key fortresses on what little territory it controlled were in Ottoman hands. It seemed only a matter of time before the Greeks were forced to capitulate. In June 1827 the Acropolis of Athens, the last Greek fortress on the mainland, capitulated to Ottoman forces.
At this critical juncture, the Greek cause was rescued by the decision of three Great Powers, Great Britain, France and Russia, to intervene jointly in the conflict.
Motives of the Great Powers
Post-Napoleonic Europe
The Greek revolution took place in the aftermath of the Napoleonic Wars, which ended in 1815. The victorious Allied Powers were determined to prevent any repetition of the subversive chaos caused by the French Revolution, and by Napoleon's subsequent attempt to export it to the rest of Europe. At the Congress of Vienna was born the Conservative Order, the principle that the legitimate monarchies of Europe should be inviolable, in both their constitution and territory. The new order was to be defended against all by the Great Powers acting in concert, after negotiations at periodic conferences. This process became known as the Congress system.
The Greek revolution presented the conservative order with its first significant challenge. Prima facie, the Greek revolt was a violation of its basic principle, as it involved a revolt against an established monarchy and an attempt by a part of its territory to secede. This was certainly the position adopted by the two chief architects (and enforcers) of the Congress system, British foreign secretary Viscount Castlereagh and Austrian chancellor (prime minister) Prince von Metternich. But the Russians contended that the principle did not apply to the non-Christian, "Asiatic" Ottoman Empire. The Greek issue thus became entangled in the Eastern Question - the name given to the Great Power diplomacy surrounding the decline of the Ottoman Empire.
Russia
The Russian menace: a comic map of Europe (1877), showing the Russian empire as a monstrous octopus devouring neighbouring lands, especially the Ottoman empire. The cartoon epitomises the fear of Russian expansionism which dominated 19th-century Great Power diplomacy in the East and culminated in the Crimean War (1853-6), a joint Anglo-French expedition aimed (unsuccessfully) at deterring Russia from its ceaseless encroachment on Ottoman territory
The most pro-Greek power was Russia. As the sole Orthodox Christian great power, Russia had long seen itself as the protector (and potential liberator) of the Balkan and Greek subjects of the Ottoman Empire, who were predominantly of the Orthodox faith. The Serbs and Bulgarians were also fellow Slavic-speakers. These cultural and emotional bonds dovetailed neatly with Russia's geostrategic interests. Supporting a breakaway Greek state, which would be a natural ally of Russia, was an obvious way to advance Russian influence in south-east Europe. The main problem for supporters of Greece in Russia was that Greece was only one of several issues that were in contention between St Petersburg and the Sublime Porte: others included Russia's ambition to impose a protectorate over the Romanian principalities and Serbia, its demands for control of the Principalities' Black Sea ports, the right of Russian warships to sail through the Bosporus, and Russia's annexation of territories in the Caucasus.
Austria and Great Britain
The decisive Russian triumph in the Russo-Turkish War of 1768-74, which brought enormous lands in the Black Sea region as far as the Caucasus under Russian control, resulted in a great fear of Russian expansion on the part of the other great powers, especially Austria and Great Britain. Austrian foreign policy underwent a complete volte-face. For centuries the Austrians were the Ottomans' arch-enemies, bloodily contesting literally every inch of Hungary and Transylvania. But from the late 18th century onwards, the Austrians, threatened with encirclement by Russian ambitions in the Balkans, became firm supporters of the Ottoman empire's integrity. In this they were joined by Great Britain, whose leaders were fearful of Russian expansion into Central Asia as a threat to British India (see the Great Game). The British government was concerned that a successful Greek secession could trigger a series of nationalist revolts that could lead to the disintegration of the Ottoman Empire, leaving an enormous power-vacuum which the Russians were best-placed to fill. When the Greek revolution broke out in 1821, the British Cabinet was dominated by the conservative faction of the ruling Tory party, including Castlereagh, Lord Liverpool (prime minister) and Duke of Wellington, the victor of the Battle of Waterloo and now Master General of Ordnance. These men were resolute supporters of Ottoman territorial integrity.
France
The French government's involvement had somewhat confused motives. France's defeat in the Napoleonic Wars had confirmed Britain's naval supremacy in the Mediterranean. The guiding motive of French policy in the Mediterranean thus remained the same as Napoleon's had been before 1815: to challenge Britain's hegemony, but this time by diplomacy rather than by war.[9] As Napoleon had done with his expedition in 1798, the French government focused on Egypt. France had equipped and trained a modern army and navy for Muhammad Ali Pasha's regime, a policy viewed with intense suspicion by London. It was felt that a likely consequence, intended or not, was Egyptian secession from the Ottoman Empire (which indeed eventually happened).[10] The Paris government also adopted in the Mediterranean, almost on principle, policies opposed by London, such as favouring great power intervention in the Greek conflict. Inconsistently, however, Paris shared London's concern about Russian expansionism and also supported, at least formally, Ottoman territorial integrity.
European public opinion
Despite their lack of enthusiasm for the rebellion, the British and French governments were under mounting pressure from their home public opinion to assist the Greeks. Whatever the geostrategic implications of their revolt, the Greeks, in the eyes of most Britons and Frenchmen, were gallant Christian fighters struggling to free themselves from a corrupt and oppressive Islamic tyranny. In an era when nationalism was inextricably linked to liberalism, the Greek insurgency became a rallying-cry for liberals all over Europe, and especially for French liberals, whose political action at home were severely restricted by the Bourbon monarchy restored to power by the Allied powers in 1815. Both London and Paris hosted powerful philhellenic committees, supported by prominent and wealthy personalities, such as the romantic poet Lord Byron in England (who died fighting for the Greek cause in 1824) and the writers Chateaubriand and Victor Hugo in France. The Committees raised large sums of money for the Greek revolutionaries, agitated in the press and equipped and despatched hundreds of volunteers to fight in Greece.[11] Popular pressure for intervention intensified after Ibrahim Pasha's brutal invasion of the Peloponnese. The atrocities committed by his forces, loudly advertised and greatly exaggerated in the liberal press, sparked a furore throughout Europe. Ibrahim was denounced in the French press as Le Sanguinaire ("The Bloodthirsty One").[12] This was acutely embarrassing to the French government, which had equipped and trained the Egyptian forces. The Greek revolt was probably the first occasion in European history when public opinion had a significant impact on great power foreign policy. []
Strategic considerations
Both the Russian and French governments had to contend with the basic strategic fact that providing naval assistance to the Greeks was not practicable without British consent, because of Britain's naval supremacy in the Mediterranean.[9] Britain's crushing naval victories over France and Spain in the Napoleonic Wars had turned the Mediterranean into a British lake, closely controlled by a string of strategic bases from Gibraltar to the Ionian islands, which Britain had taken over from the French in 1815 and were the only part of Greece not under Ottoman rule. This meant that any French intervention was in effect subject to a British veto. But the Russians had an alternative option, beyond Britain's veto, of attacking the Ottoman Empire by land across the Danube (and by sea in the Black Sea).
Great Power diplomacy
George Canning, British foreign secretary 1822-7 and prime minister April–August 1827, architect of the Treaty of London, which launched European intervention in the Greek conflict
Tsar Nicholas I of Russia, (r. 1825-55). A Russian nationalist and Orthodox crusader, he prodded Britain into giving naval assistance to the Greeks and then launched the Russo-Turkish War of 1828-9, which finally secured Greek independence and Russian hegemony in the Black sea region
From the inception of the Greek revolt until 1826, British and Austrian diplomacy (directed by Castlereagh and Metternich respectively) aimed at ensuring the non-intervention of the great powers in the conflict.[13] Their objective was to stall Russian military intervention in support of the Greeks, in order to give the Ottomans time to defeat the rebellion, which Metternich was convinced they were capable of doing.[14]
This diplomacy was initially successful because the reigning Tsar, Alexander I (r.1801-25), was reluctant to support any revolutionary movement because of his experience during the Napoleonic Wars. Despite fervent support for the Greek cause in Russian nationalist circles, Alexander proved unwilling to defy Metternich and Castlereagh and offer the Greeks more than (limited) diplomatic support.[15] Indeed, at the Congress of Verona (1822), Castlereagh persuaded Tsar Alexander to ignore the Greek cause altogether, even refusing to admit a Greek delegation to the conference.[16] In the same year, Alexander also forced the resignation of his ethnic Venetian/Greek foreign minister, Count Giovanni Capo d'Istria (Ioannis Kapodistrias, later president of the First Hellenic Republic), for his passionate advocacy of the Greek cause. In 1824 the Tsar proposed a plan for Greek autonomy to the other powers.[17] But it was clear that he was simply not prepared to act unilaterally.[18]
In 1822, Castlereagh was succeeded as foreign secretary by George Canning, to Metternich's dismay. Canning was a liberal Tory, and hostile to the conservative faction led by Wellington. He had even fought a duel with Castlereagh in 1809 over policy disagreements. He detested Metternich's intrigues and was more sympathetic to the Greeks, having joined the London Philhellenic Committee. Nevertheless, until 1826 his policy remained the same as Castlereagh's: non-intervention.[19]
But the Ottomans proved unable to suppress the revolt during the long period of non-intervention secured by British and Austrian diplomacy. By the time the Ottomans were making serious progress, it was too late. In December 1825, the diplomatic landscape changed with the death of Tsar Alexander and the succession of his younger brother Nicholas I (r. 1825-55). Still only 30 years old, Nicholas was a more decisive and risk-taking character than his brother, as well as being far more nationalistic. In foreign policy, he adopted a two-faced stance. In western Europe, he became notorious as a ferocious defender of the established order, earning the sobriquet of "the gendarme of Europe" by his willingness to despatch troops as far away as Italy to help crush liberal revolutions. But in the Balkans, he eagerly adopted the mantle of Orthodox crusader and liberator. In this regard, he did not share his brother's aversion to unilateral action. In diplomatic circles, it was now widely believed that it was only a matter of time before the Russians went to war against the Porte.
Canning's response to the new situation was to move towards joint intervention: if intervention by Russia was inevitable, then he intended to ensure that it be constrained within parameters acceptable to Britain. He promoted a solution essentially the same as Tsar Alexander's: Greek autonomy under Ottoman suzerainty.[20] The formula was enough to satisfy the Russians, while for the British it had the attraction of preserving Ottoman territorial integrity. A protocol centred on this proposal and envisaging the powers' mediation was signed by Britain and Russia in April 1826. This was a turning-point in British policy, as it envisaged intervention for the first time. The Tsar then surprised the British by making the protocol public (although it was intended only as a first step in a process leading to a formal treaty) and using it as a lever to pressure the Porte. However, neither the Tsar nor the Porte were yet ready for war. Both governments were in the process of modernising their armies, and the Tsar was also concerned with internal unrest in the wake of the Decembrist coup attempt which had nearly prevented his accession.[21] As a result, both settled for a compromise, signing the Convention of Akkerman in October 1826. In return for the Tsar dropping the Greek issue from the negotiations, the Sultan conceded long-standing Russian demands as regards the Romanian Principalities and Serbia.[22]
The Porte probably believed it had bought off Russian support for the Greeks, neutralising the Anglo-Russian protocol of April. But Tsar Nicholas had no intention of forgetting Greece. Negotiations proceeded on a formal treaty based on the protocol, now with France included. (Metternich refused an invitation to participate, and continued to support the Porte). But progress stalled, largely because of continuing opposition within the British Cabinet to intervention, led by the Duke of Wellington. The Tsar became impatient, and stepped up pressure on Great Britain by despatching in October 1826 a naval squadron to the Mediterranean from St Petersburg, sending them off by expressing confidence that they would soon be able to despatch the Ottoman fleet à la Russe. The squadron pointedly visited the British naval base of Portsmouth en route. This implied threat of unilateral action by Russia strengthened Canning's hand in the Cabinet: when, in April 1827, Liverpool was obliged by illness to step down as prime minister, Canning won the contest to succeed him. Wellington promptly resigned, clearing the way for a treaty to be concluded.[23]
Treaty of London
The three Powers signed the Treaty of London on 6 July 1827. Citing the disruption of trade in the Mediterranean caused by the war as the justification for allied intervention, the treaty called for an immediate armistice between the belligerents, in effect demanding a cessation of Ottoman military operations in Greece just when the Ottomans had victory in their grasp. It also offered Allied mediation in the negotiations on a final settlement that were to follow the armistice.[24]
The treaty called on the Porte to grant the Greeks autonomy. The treaty envisaged Greece remaining under Ottoman suzerainty, and paying an annual tribute to the Sultan.[25] The amount of tribute was to be negotiated and fixed permanently, to avoid the situation which had developed in the Romanian Principalities, where variable tributes had become crushing burdens and had kept those countries in poverty for two centuries. (The Porte, which had the power to appoint - and depose - the princes, effectively auctioned the Principalities to those candidates among the Romanian boyar aristocracy who pledged to pay the highest amount of tribute).
A secret clause in the agreement provided that if the Porte failed to accept the armistice within a month, each signatory Power would despatch a consul to Nafplion, the capital of the Hellenic Republic, thereby granting de facto recognition to the rebel government, something no Power had done hitherto.[26]
The same clause authorized the signatories in concert to instruct their naval commanders in the Mediterranean to "take all measures that circumstances may suggest" (i.e. including military action) to enforce the Allied demands, if the Ottomans failed to comply within the specified time limit. However, the clause added that Allied commanders should not take sides in the conflict.[27]
The treaty was thus a contradictory document, reflecting the conflicting priorities of the signatories, with the Russians demanding a harder line with the Ottomans than their allies. It called for a negotiated settlement, but predetermined what the end result of those negotiations should be. It offered mediation, but threatened the use of force. It authorized force to be used, but forbade joining in the hostilities. Above all, although it was couched in neutral language, in reality it favoured the Greek position. The critical point is that it committed the European powers to armed intervention and effectively guaranteed a successful outcome for the Greek revolution. It was signed just in time, as its architect Canning died in office just a few weeks later.
Prelude
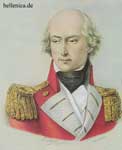
Vice-Admiral Sir Edward Codrington, Allied commander-in-chief at the Battle of Navarino
Ibrahim Pasha, the son of a renegade ethnic-Greek mother from Thrace, who was adopted as a child by the Egyptian ruler Muhammad Ali when the latter married his mother and brought up as a Muslim. He commanded the Egyptian expedition to the Peloponnese (1825-8). The atrocities committed by his forces against the Greek population made him the most reviled figure in Europe. But he was an able general and later (1831-9) inflicted crushing defeats in Syria on his nominal overlord, the Ottoman Sultan Mahmud II
On 20 August 1827, the British naval commander-in-chief in the Mediterranean (i.e.. commander of "Blue" Squadron), Vice-Admiral Sir Edward Codrington (1770–1851), veteran of 44 years at sea and a popular hero for his role in the Battle of Trafalgar, received his government's instructions regarding enforcement of the treaty. Codrington could not have been a less suitable character for a task which required great tact. He had joined the Royal Navy at age 13 as a midshipman and worked his way to the top by sheer merit and courage. An impetuous fighting sailor, he entirely lacked diplomatic finesse, a quality he despised and derisively ascribed to his French counterpart, H. de Rigny. He was also a sympathiser with the Greek cause, having joined the London Philhellenic Committee.[28]
His instructions were to impose and enforce an armistice on both sides and to interdict the flow of reinforcements and supplies from Asia Minor and Egypt to Ottoman forces in Greece. He was to use force only as a last resort.[29]
On 29 August, the Porte formally rejected the Treaty of London's stipulations, triggering the dispatch of Allied representatives to Nafplion. On 2 September, the Greek provisional government accepted the armistice. This freed Codrington to concentrate on coercing the Ottoman side.[30]
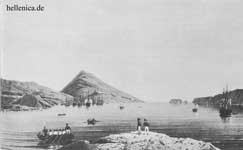
Navarino Bay is a large natural harbour on the west coast of Messenia (SW Peloponnese). It is approximately 5 km long (between the headlands) and 3 km wide. The bay is sheltered from the open sea by a long, narrow islet (Sphacteria). This islet leaves two entrances to the bay. Because of a sandbank, the northern one is very narrow and shallow, 100 m wide and just 1 m deep in places, impassable to large boats. The southern one is much wider, 1500 m, with an effective passage of 1000 m width because of rocks. The southern entrance was at that time guarded by an Ottoman-held fort, at Navarino (Pylos). During the Greek insurgency, the bay was used by the Ottoman navy as its main operational base in the Peloponnese.
A large Ottoman-Egyptian fleet, which had been warned by the British and French to stay away from Greece, left Alexandria on 5 August 1827 and joined other Ottoman units at Navarino on 8 September.[31] In response, Codrington arrived with his squadron off Navarino on 12 September. In talks on 25 September with Ibrahim Pasha and the Ottoman admiral, he extracted verbal promises that they would cease offensive operations by land and sea.[32] After these talks, Codrington withdrew to the nearby British-controlled Ionian island of Zante (Zakynthos), leaving a frigate off Navarino to keep watch on the Ottoman fleet.
But the Ottomans soon violated these undertakings. Ibrahim was outraged that, while he was expected to observe a ceasefire, Codrington seemingly allowed the Greeks to continue military operations unhindered. The Greeks' British commanders were on the offensive at the entrance of the strategically vital Gulf of Corinth. Church's army lay siege to the Ottoman-held port of Patras, while Cochrane organised a revolt behind Ottoman lines in Epirus. By sea, Hastings' steam-powered warship, the Karteria, launched a daring night-raid (29/30 September) at Itea on the northern shore of the Gulf, sinking 9 Ottoman gunboats. The problem for Codrington was that these officers were acting on their own initiative, largely ignoring the often contradictory directives of their employer, the Greek provisional government. Recognising that appeals to the latter were ineffective, Codrington despatched aides directly to the British commanders to demand that they cease operations, but with little result.[33]
After a vain protest to Codrington, Ibrahim decided to act. On 1 October, he despatched a naval squadron to reinforce the Patras garrison. It was intercepted by Codrington's squadron at the entrance to the Gulf, and forced to return to Navarino, shadowed by Codrington. Ibrahim tried again on the night of 3/4 October, this time leading the squadron in person. Using the darkness, he succeeded in slipping past the British picket-ship unobserved, but was prevented from entering the Gulf by a strong headwind. His squadron was obliged to anchor in the lee of Cape Papas and wait out the storm. This gave Codrington time to catch up, and the British squadron, after a whole day of fighting the wind, arrived off Papas on the evening of 4 October. Codrington fired a series of warning broadsides, and Ibrahim reluctantly decided to turn back.[34]
In the meantime, Ibrahim's scorched-earth policy continued unabated on land. The fires of burning villages and fields were clearly visible from Allied ships standing offshore. A British landing party reported that the population of Messena was close to mass starvation.[35]
On 13 October Codrington was joined off Navarino by his allied support, a French squadron under De Rigny and a Russian squadron under L. Heyden. On 18 October, after futile attempts to contact Ibrahim Pasha, Codrington, in conference with his Allied colleagues, took the fateful decision to enter Navarino bay and anchor his ships face-to-face with the Ottoman/Egyptian fleet. It was decided that with winter approaching, it was impracticable to maintain an effective blockade of Navarino and that in any event, the population of the Peloponnese had to be safeguarded.[36] Although this was highly provocative act, Codrington claimed that there was no intention to engage in battle, but only to make a show of force to induce the Ottomans to respect the armistice and to desist from atrocities against the civilian population.[37]
Relative strength of the two Fleets
Satellite picture of the Peloponnese. Navarino bay is visible below the legend "Messinia". Click on picture to enlarge
Map of Navarino bay. The diagram of the order of battle contains inaccuracies
Flames engulf Ottoman triple-gundeck battleship Mansur al-Liwa, flagship of Kara-Ali Pasha, Kapudan Pasha (Grand Admiral) of the Ottoman Navy, after it was struck by a Greek fireship in Chios harbour on the night of June 6/7, 1822. Moments later, the vessel's gunpowder magazine exploded, killing everyone on board, including the admiral himself and 2,000 crew and guests at an official reception. The fireship's sails are visible to the rear; in foreground, the fireship's crew make their escape in a lifeboat, with their commander Constantine Kanaris at the helm. During their struggle for independence, the Greeks destroyed some 40 Ottoman warships in this manner, neutralising the Ottomans' massive naval superiority. Adopted by the Ottomans, fireships were potentially their most dangerous weapon at Navarino
Allies
The Allied navies at this time were still deploying essentially the same technology as during the Napoleonic Wars: sailing ships, unarmoured wooden hulls and muzzle-loading smoothbore cannon. The navies, especially the British one, had ignored the new technologies that were to transform them by the 1850s: steam propulsion, ironclad hulls, rifled guns and explosive shells. All these had been invented by 1827, but their development for naval warfare, let alone introduction, met dogged resistance from senior naval echelons. In the words of one scholar: "The great admirals of the 18th century would have had no difficulty in taking over Codrington's command at short notice."[38] The British navy did not deploy steam warships until the 1840s. Ironically, the fledgling navy of the Greek revolutionaries was far ahead of the field: they possessed a small warship propelled by steam-powered paddles (as well as sails) called the Karteria. Entering service in 1826, it was the first steam warship to see combat in history.[39]
However, the Royal Navy's warships had seen some improvements. Ships with triple gun-decks such as Nelson's famous HMS Victory had been phased out. Triple-deckers had been found to be too unstable and difficult to manoeuvre. The standard Canopus-class battleship was now a double-deck 74-84 gun boat, based on the successful "74" French design. In addition, gun-calibres had been upgraded. The Napoleonic-era Fame-class battleships had been equipped with 32-pounders on the main gun-deck, 18-pounders on the upper deck and 9- and 12- pounders on the super-structures (quarterdeck and forecastle). In contrast, the guns were now all 24- or 32-pounders (plus a couple of massive 68-pounder carronades on the super-structures). Frigates were either double-deckers of 50-60 guns (known as large frigates); or single-deckers with 24-44 guns.[38]
Most of the Allied ships, however, were still veteran Napoleonic-era warhorses (e.g. HMS Albion). Codrington's only Canopus-class battleship was his flagship, HMS Asia (launched 1824), although Genoa (an impounded French "74") was also post-Napoleonic (1816). In the French squadron, De Rigny was so appalled by the state of the 3 battleships sent to him that he decided to keep his flag on the Sirène, a modern frigate.[40]
Ottomans
Overall at Navarino, the Allies had 22 ships and 1,258 guns against the Ottomans' 78 ships with 2,180 guns (figures exclude smaller boats and fireships).[41] But the numbers masked major Allied advantages in ship-types, gun-calibres and crew quality. As a result of these, Allied gun-crews could fire more powerful, more frequent and more accurate cannonades than their Ottoman counterparts.
The Allies had a substantial superiority in front-line combat vessels: 10 battleships to the Ottomans' 3. This advantage was only partially offset by the Ottomans' 7 double-deck frigates against 1 Allied vessel of this kind. The great majority of the Ottoman-Egyptian fleet were smaller vessels – 58 corvettes and brigs – which were of little use against the Allied heavyweights: they had much smaller firepower, and, their decks being lower, could easily be dismasted by raking fire. In addition, the Ottoman-Egyptians mainly deployed smaller-calibre guns than the Allies (often the guns discarded by the Allies when they upgraded their own calibres). Most of the Allied crews had gained extensive combat experience in the Napoleonic Wars, which had only ended 12 years previously, and were service professionals. In contrast, the Ottoman crews only had combat experience against the Greek revolutionary naval forces, which although gallant and effective, bore no resemblance to the navies of the Great Powers. In many cases, Ottoman crews impressed men. Some Ottoman crew were even found, after the battle, to have been shackled at their posts (convicts, Greek prisoners or other involuntary recruits).[42]
The Egyptian contingent, the largest and best-equipped of the Ottoman fleet at Navarino, had been trained by a team of French officers, under the overall direction of Capt J-M. Letellier. These officers acted as "shadow-captains" of the large Egyptian vessels, each advising the nominal Egyptian captain. The day before the battle, De Rigny persuaded these officers to withdraw from the Egyptian fleet so as to avoid the possibility of fighting against their own navy (they moved to an Austrian brig that was in the bay, ostensibly neutral but in reality providing logistical support for Ottoman operations). Letellier himself was sick and also took no part.[12] This deprived the Egyptians of experienced command.
For the Allies, probably the Ottomans' most dangerous weapon were their fireships. The latter, the "poor man's battleship", had long been deployed to devastating effect by the Greek revolutionaries against the Ottomans, who had learnt how to use them through hard experience.[43] Fireships were posted on the wings of the Ottoman formation, and could, if effectively deployed, wreak mayhem on Allied boats concentrated in enclosed waters, especially as Allied sailors had no experience of this kind of warfare. The danger was graphically demonstrated in the early phase of the battle, when the French battleship Scipion narrowly escaped being destroyed by a fireship.[44]
The Ottomans possessed a shore battery on each side of the main entrance to the bay, in Navarino fort and on the southern tip of Sphacteria island. These could seriously have impeded Allied entry into the bay, but Codrington was clearly confident that the Ottomans would not start a shooting war. (Or, in an alternative interpretation, he hoped that they would, to give him an excuse to destroy the Ottoman fleet).
Strategies
Following an elaborate defensive plan proposed by Letellier, the Ottoman-Egyptian fleet was anchored in a horseshoe formation, in three lines, extending from Navarino fort to the southern tip of Sphacteria island, where the Ottoman shore battery lay. The front line consisted of the heavy boats, battleships and large frigates; the 2nd line contained the remaining frigates and larger corvettes; the 3rd consisted of the remaining smaller boats. The idea was that the small boats could fire through the gaps in the frontline, whilst being protected by the large boats from Allied attack. On the ends of the horseshoe were stationed corvettes and fireships.[45] The latter could be towed by small boats into position covered by the smaller corvettes and shore batteries.[46][47]
The Allied plan was to anchor in the free water inside the crescent. Codrington's squadron would take up position facing the centre of the Ottoman line; the French and Russian squadrons would face the Ottoman left and right wings respectively. The French position in the line had been specifically determined so that they would face the Egyptian fleet, which had been trained by the French and might be reluctant to fight against Egypt's closest European ally.[48] In conventional naval doctrine, Codrington's plan would have been regarded as an unacceptable risk, as it would have invited the enemy to try to surround the Allies.[49] Furthermore, with the prevailing wind blowing from the SW, straight up the entrance, Codrington risked becoming trapped, unable to extricate his squadrons quickly if necessary. The adoption of this high-risk plan shows the total confidence of the Allied commanders in the tactical superiority of their vessels.
Battle
At 1.30 PM, 20 October 1827, off the entrance to Navarino bay, Codrington signalled to the Allied fleet: "PREPARE FOR ACTION" and Allied crews were ordered to stand to their guns.[50] Gun-ports were left half-open, but Allied captains were under strict orders to open fire only if attacked. At 2.00 PM, Allied warships, with Codrington in the lead in Asia, began filing into the bay through the southern entrance, proceeding in two lines, British followed by French to starboard (SE, closest to Navarino) and Russians to port abreast but slightly behind the French. There was no attempt to prevent their entry by the Ottoman shore batteries or their corvettes posted at the entrance, but Codrington received a launch carrying a message from Ibrahim Pasha. This stated that he had not given permission for the Allies to enter the bay, and demanded that they withdraw. Codrington dismissed Ibrahim's objection, replying that he had come to give orders, not to take them. He warned that if the Ottomans opened fire, their fleet would be destroyed.[50][51]
Ottoman fleet ablaze in Navarino bay, 20 Oct 1827
Action at close quarters during the battle. This detail shows Codrington's flagship, HMS Asia (centre, flying Blue Ensign), simultaneously demolishing two Ottoman flagships
Battle of Navarino, by Ivan Aivazovsky, showing the Russian squadron, in line ahead (left-centre, white flags with blue transversal crosses) bombarding the Ottoman fleet (right, with red flags)
Burning and beached hulks of Ottoman warships under the cliffs of Navarino. Painting by Auguste Mayer
As his flagship cast anchor in the middle of the Ottoman line, Codrington ordered a brass band to play on deck to emphasize his peaceful intentions. By 2.15 PM, the 3 British battleships had dropped anchor in their allotted positions.[52] Meanwhile as the Allied vessels moved into position, along the Ottoman lines trumpets sounded action stations. Ottoman crews scrambled to meet the unexpected intrusion into their base.
At this point, at the entrance, fighting broke out. Codrington claimed that hostilities were started by the Ottomans. The outbreak, according to Allied sources, occurred in the following manner:
At the entrance to the bay, Capt Thomas Fellowes on the frigate Dartmouth had been detailed, with six smaller boats (2 brigs and 4 schooners) to keep watch on the group of Ottoman corvettes and fireships on the left flank of the Ottoman line. As the Allied ships continued moving into the bay, Fellowes noticed that an Ottoman crew was preparing a fireship and sent a boat to instruct them to desist. The Ottomans fired on the boat and lighted the fireship. Fellowes sent a cutter to tow the fireship to a safe distance, but the Ottomans fired on the cutter, inflicting casualties. Fellowes opened musket fire on the fireship crew to cover his men. At this point the French flagship Sirène, which was just then entering the bay on the tail of the British-French line, opened fire with muskets to support Dartmouth. An Ottoman corvette then attacked Sirène with its guns. This chain reaction spread along the line, so that within a short time, there was general engagement.[53]
The battle thus began before the Allies could complete their deployment. In fact, this proved to be a tactical advantage, as it meant some Allied ships were not yet at anchor and could therefore manoeuvre more swiftly. Nevertheless, most ships fought at anchor. There was naturally very little scope for manoeuvre, except to change the orientation of the boat by hauling on the springs on the anchor chains.[54] With ships blasting each other at very close range, the encounter was mostly a matter of attrition, in which superior Allied firepower and gunnery were critical.
Combat action may be summarised as follows:
The French battleship Scipion (80 guns), behind De Rigny's Sirène (60), immediately came under intense attack, by a combination of Egyptian frigates on both sides, the shore batteries and a fireship. The latter was nearly fatal. The fireship jammed under Scipion's bowsprit, the fore sails caught fire and the fire spread onto the upper gun-deck. Men flung themselves on the fire to prevent it spreading to the forward powder magazine, with inevitable horrendous burn injuries. Nevertheless, the gunners continued to fire on the attackers. Scipion was saved from destruction by her sister ship Trident (74), which succeeded in attaching a tow-line to the fireship and, with the assistance of Dartmouth and 2 other British boats, pulling it clear.[44]
De Rigny's Sirène fought a lengthy duel with the 64-gun frigate Ihsania, which finally blew up. Sirène suffered significant casualties and damage. Sirène, with the support of Trident and Scipion, then bombarded the fort of Navarino and eventually silenced its shore battery.[55]
The captain of French battleship Breslau (84), Capt De la Bretonnière, seeing that De Rigny did not need further support, decided on his own initiative to break away from the French formation and move into the centre of the bay, at the junction of the British and Russian lines, to reinforce British battleship Albion (74) and Russian battleship Azov (80). Both were hard pressed. Albion, which had wrecked an Ottoman frigate as she anchored, was under fire from all 3 Ottoman battleships simultaneously. Fortunately for her, the enemy gunnery was inept. Even so, Breslau's intervention was later acknowledged by the captain of Albion as having saved his ship from annihilation. Breslau then proceeded to play a leading role in the destruction of Ottoman admiral Tahir Pasha's flagship, the Ghiuh Rewan (84), and at least 4 frigates.[56]
Codrington's Asia (84) was anchored between Ottoman admiral Capitan Bey's flagship, battleship Fahti Bahri (74), and Egyptian Moharram Bey's frigate Guerrière (60). Capitan Bey opened fire, but Moharram Bey sent word to Codrington that he was not going to attack. This enabled Asia to concentrate its fire on Fahti Bahri, which was in a poor condition and inadequately manned. Asia's deadly fire shortly disabled her. Codrington then sent an interpreter, Greek P. Mikelis, to parley with Moharram Bey; but Mikelis was shot dead as he went aboard. Guerrière then opened fire, but was reduced to a burning wreck within 20 minutes by crushing broadsides from Asia and Azov.[57] However, Asia suffered severe casualties and damage due to a concentration of heavy fire from smaller Ottoman boats in the second and third lines of the Ottoman formation: as Letellier had planned, these boats fired through the gaps in the front line. Codrington also believed that Asia had taken serious hits by mistake from sister battleship Genoa.[58]
The Russians under Heyden were the last to take up station, as was planned. Their position, on the right end of the Ottoman crescent, was the most exposed. The fighting in this sector was even more intense than elsewhere. Azov sank or disabled 3 large frigates and a corvette, but herself took 153 hits, several below the waterline.[59]
The British frigates Armide and Talbot initially had to face the frigates on the Ottoman right wing and the island shore battery unsupported, as the other two frigates were away and arrived later. They were saved from annihilation by the arrival of the Russian frigates.[60]
The British and French small boats (brigs and the schooners Alcyone and Daphne), under the overall direction of frigate Dartmouth, had been allotted the vital task of preventing fireship attacks. Their success was complete: apart from the initial fireship attack on Scipion, not a single fireship struck a target during the battle. A number of small boats greatly distinguished themselves, suffering casualties as great, in proportion, as the battleships.[61]
By about half-time in the battle (circa 4 p.m.), all 3 Ottoman battleships and most of the large frigates of the 1st line had been despatched. This left the mass of smaller boats in the 2nd and 3rd lines at the mercy of the Allied battleships, all of which were still operational. During the ensuing massacre, Codrington tried twice to order a ceasefire, but his signals were either invisible because of the thick smoke or ignored in the heat of the battle.[62] Within the following two hours, virtually the entire Ottoman fleet was destroyed, despite the signal bravery of the Ottoman crews, which was praised by Codrington himself in his despatches. Three quarters were sunk: many of them, dismasted but still afloat and reparable, were blown up or set on fire by their own crews to prevent them falling into Allied hands.[63]
This contributed to the horrendous Ottoman and Egyptian casualty figures, as many men were trapped in burning or exploding vessels. Some, as mentioned, were shackled to their posts. Ottoman casualties given to Codrington by Letellier were approx. 3,000 killed, 1,109 wounded, although Codrington claimed the reverse was more likely. Of the entire Ottoman-Egyptian armada of 78 vessels, just 8 remained seaworthy: 1 dismasted battleship, 2 frigates and 5 corvettes.
Allied casualties were given by Codrington as 181 killed, 480 wounded (including Codrington's youngest son, midshipman H. Codrington, serving on Asia under his father, who was badly injured but made a full recovery).[64] Several Allied ships were severely damaged: the 3 Russian battleships Azov, Gangut and Iezekiil were disabled. The three British battleships had to be sent to England for repairs.[65] In fact, given the rough handling all the battleships had endured and the danger from exploding Ottoman vessels, it was miraculous that not a single Allied vessel was sunk.
As the guns fell silent at dusk in Navarino Bay, news of the outcome raced over the Peloponnese and to the rest of Greece. In village after village, church bells started a continuous peal in the night. People rushed into village squares, to be greeted by the news that the Ottoman Sultan and his hated vassal Ibrahim Pasha no longer possessed a Mediterranean fleet. In a maritime country like Greece, the implication was evident, that the fledgling Greek state was saved. Wild rejoicing broke out, and lasted through the night and for days after. Huge bonfires were lit on the mountaintops of the Peloponnese and Mt Parnassos in central Greece.[66] Celebrations swept even the occupied regions, which the demoralised Ottoman garrisons made little effort to prevent.
Aftermath
This section needs additional citations for verification. Please help improve this article by adding citations to reliable sources. Unsourced material may be challenged and removed. (October 2011)
Mahmud II, Ottoman sultan 1808-39, who struggled for eight years to defeat the Greek revolution, ultimately in vain
Russian land and sea forces assail the Ottoman Black Sea fortress of Varna in Rumelia (Bulgaria), September 1828. The assault was successful, but the two other main Ottoman fortresses in Rumelia held out, extending the Russo-Turkish War for a further year
British admiral Codrington (centre) negotiating with Muhammad Ali Pasha in the latter's palace in Alexandria, Egypt (1828). In the aftermath of Navarino, Codrington pressed for an Egyptian withdrawal, but it took a year to achieve this
Despite the celebrations, the Sultan still disposed of a total of around 40,000 troops in central and southern Greece, entrenched in powerful fortresses. The final liberation of Greece was still far off, unless the Porte could be induced to accept the Treaty of London.
The Sultan, however, refused to concede defeat in Greece. On the contrary, his response to the Navarino disaster was to raise the stakes dramatically, in effect challenging Russia to decide the whole issue on the battlefield. A few weeks after the battle, in a symbolic gesture, he proclaimed jihad (holy war) against the European powers in his claimed role as khalifa (caliph, or spiritual leader) of all Muslims. More concretely, he closed the Bosporus to international shipping, a move certain to provoke Russia, whose entire Black Sea trade had to pass through the Straits. He also revoked the Convention of Akkerman, signed with Russia the previous year.
The Sultan also ordered his vassal Muhammad Ali not to withdraw his army from the Peloponnese. But the Allies despatched envoys to Alexandria to demand that the Egyptian prince do precisely that. This left Muhammad Ali in a dilemma. On the one hand, as an experienced statesman, he knew that with the Great Powers backing Greek autonomy, the game was up in the Peloponnese. On the other, he was reluctant to be seen as betraying his overlord, especially now that he had declared jihad, and also to inflict on his son Ibrahim the humiliation of a forced withdrawal.[67] So he played for time, engaging the Allies in lengthy but inconclusive negotiations, in the hope that in the meantime the Sultan would himself reach an agreement with the Allies that would permit Ibrahim a face-saving departure.
But any chance of a negotiated settlement disappeared with Russia's long-expected declaration of war on the Porte in April 1828, starting the 11th Russo-Turkish War (1828–1829) and signalling the ultimate failure of British diplomacy. With the Tsar himself present in nominal command (actual command was in the hands of veteran career-soldier Count Wittgenstein), a Russian army of 100,000 men, supported by the Black sea fleet, swept aside the Ottoman forces in the Romanian Principalities, crossed the Danube, and laid siege to Silistra, Varna and Shumla, the key Ottoman-held fortresses in Rumelia (Bulgaria). But despite substantial Russian successes by land and sea (including the capture of the crucial seaport of Varna), the 1828 campaign ended inconclusively. Silistra and Shumla remained in Ottoman hands because of their fierce defence, and the main Russian army was obliged to withdraw to Russian territory by supply shortages and disease.
Meanwhile, in Paris, a more liberal government under the Vicomte de Martignac took office in January 1828, after an election in which the Bourbon kingdom of France's tiny electorate of 74,000 mainly aristocratic voters turned against the ultra-conservative faction. Eager to court popularity, de Martignac announced in April 1828 that, in view of the failure of diplomatic efforts, France would despatch an expeditionary force of 13,000 elite troops to expel the Egyptian and Ottoman forces from the Peloponnese. The news was greeted with wild enthusiasm by the Parisian public. As urgent preparations began in France's Mediterranean ports, Ibrahim Pasha told his father that he felt confident he could repel the French. But since the sinking of his expensive modern fleet, Ali had lost all appetite for military confrontation with the Great Powers. Ibrahim's motley force of Egyptian peasants and Albanian mercenaries, he felt sure, would stand no chance against the French professionals, who were largely officered by battle-hardened veterans of Napoleon's army. Ali now engaged in serious negotiations with Codrington, who had been despatched by London to Alexandria to try to forestall the French intervention. In August, Ali agreed terms with Codrington for the withdrawal of his forces from the Peloponnese. Ibrahim initially refused to comply with his father's evacuation orders, but gave way shortly after the French troops landed in Navarino Bay at the end of August, to a jubilant reception by the Greeks. The Egyptians finally left in October 1828, a year after the naval battle. The French proceeded to clear the remaining Ottoman garrisons in the Peloponnese, which offered only token resistance, by the end of 1828. In the subsequent months, Greek forces regained control of central Greece in a lightning campaign.
For the 1829 campaign on the Danube, Tsar Nicholas dismissed the ailing Wittgenstein and handed the Russian command to his more aggressive compatriot, Count von Diebitsch, who succeeded in capturing Silistra and then surprised the Ottomans with a high-speed drive for the Ottoman capital Constantinople (Istanbul), bypassing Shumla and routing an Ottoman army sent to intercept him. In September 1829, with the Russian army camped just 40 miles from his palace, the Sultan was forced to capitulate. By the Treaty of Adrianople, he conceded a long list of Russian demands, one of which was acceptance of Greek autonomy as defined in the Treaty of London. However, Tsar Nicholas and his ministers were careful to refrian from the more extreme demands advocated by Russian nationalists, such as a Russian military occupation of the Straits or annexation of the Romanian principalities, that would risk war with Great Britain and Austria. As a consequence, London and Vienna were relieved that the outcome was not worse and reluctantly acquiesced in Russia's strategic gains.
However, the Sultan's acceptance came too late to save Ottoman sovereignty over Greece. Buoyed by the Ottoman disasters on land and sea, and their own military successes, the Greeks refused to accept anything less than full independence. Finally, at the London Conference of 1832, the Allies dropped their policy of Ottoman suzerainty and accepted Greek independence, but insisted that the new state should be a monarchy not a republic. Later that year, the Sultan was forced by the Allied powers to sign the Treaty of Constantinople (1832) formally recognizing the new Kingdom of Greece as an independent state. The latter's territory, however, was restricted to just those regions from which Ottoman forces had been expelled, namely the Peloponnese, the Cyclades islands of the Aegean Sea and central Greece. Many regions with an ethnic-Greek majority (Thessaly, Epirus, part of Macedonia and Thrace, the remaining Aegean islands, Crete and Cyprus), remained under Ottoman rule.
The disastrous secession of Greece was by no means the end of the Sultan's tribulations. Ironically, the gravest threat to the Ottoman empire's integrity that emerged was not from Russia, but from Egypt. Having lost his fleet and the hereditary fiefdom promised to his son, Muhammad Ali now demanded as compensation that Ibrahim be appointed wali (viceroy) of the Ottoman province of Syria (which included modern Syria, Lebanon and Palestine). When the Sultan refused, Muhammad Ali sent an army under Ibrahim into Syria in 1831. Swiftly defeating the local Ottoman forces and overrunning the province, Ibrahim crushed an Ottoman army in Anatolia and prepared to march on Constantinople. He was forced to stop by the intervention of Britain and France, which, however, obliged the Porte to grant Ibrahim control of not only Syria, but also the island of Crete and of the Hijaz region of Arabia. His rule was characteristically oppressive and sparked a series of indigenous revolts, notably the Palestinian Arab revolt of 1834. In 1839, the Sultan launched a military attempt to oust him, but the Ottoman army was again routed by Ibrahim, who again invaded Anatolia. At this critical juncture, the exhausted Mahmud II died and was succeeded by his teenage son, Abdulmecid I. Faced with the spectre of the disintegration of the Ottoman empire, the British and Austrian navies intervened directly in the Levant by blockading the Nile Delta coast and forced Ali to withdraw his forces from Syria (1840). In return, the Allies obliged the young Sultan to grant Ali an unprecedented hereditary vice-regency over Egypt. The dynasty that Ali founded ruled Egypt until the nationalist/military coup of 1952. But de facto independence from the Ottomans was soon replaced by de facto rule from Whitehall. After the construction of the Suez Canal in 1869, which instantly became the main shipping-route to British India, successive British governments decided that Egypt was simply too strategic to be left to its own devices and imposed a military protectorate over the country. British troops were stationed in Egypt from 1875 to the end of the Second World War in 1945 and Ali's successors were reduced to puppets of British imperial policy.
Codrington controversy
The news of Navarino made Codrington a hero twice over in the eyes of the general British public. But in Whitehall, senior naval and diplomatic echelons were appalled by the outcome of his campaign. It was considered that Codrington had grossly exceeded his instructions by provoking a showdown with the Ottoman fleet, and that his actions had gravely compromised the Porte's ability to resist Russian encroachment. At a social event, King George IV was reported as referring to the battle as "this untoward (i.e., undesirable) event". Codrington's political situation in London became even more precarious with the return of Wellington to government in January 1828, this time as Prime Minister at the head of the Tory Government 1828–1830. The coincident launch of Tsar Nicholas' war on the Porte realised the worst fears of British policy-makers and deepened their anger at Codrington.
Initially, official disapproval of Codrington had to be restrained because of the admiral's huge popularity with the public. The Admiralty's revenge took petty form, such as its refusal, despite repeated requests by Codrington, to pay his crews their traditional prize-money from the sale of captured Ottoman treasure and goods. Meanwhile, Wellington was biding his time until he felt it was politically safe to remove Codrington from the Mediterranean theatre. Finally, in June 1828, the Admiralty announced that Codrington was being relieved of his command (although he remained in acting-command until his replacement arrived in August). Although the King felt obliged by public opinion to grant Codrington the high honour of the Grand Cross of the Bath, the Admiralty's failure to give him another operational command in his remaining decade of service or to promote him to full Admiral until shortly before his retirement from the Navy in 1837, were eloquent testimony to his fall from favour.
Codrington spent much time in his later years defending his actions in Greece. His enemies accused him of deliberately plotting the destruction of the Ottoman fleet because of his Hellenophile sympathies, a charge that Codrington vehemently denied. The issue turned on whether he knew that his move into Navarino Bay would result in a battle. The evidence is mixed. On the one hand, there are Codrington's clear orders to his captains to engage only if attacked. On the other is Codrington's private correspondence, notably to his sister, which suggests that he regarded a military showdown as inevitable.[68]
Commemoration of the battle
There are a number of memorials to the battle around Navarino Bay. The main square of Pylos, Three Admirals' Square (Greek: Πλατεία Τριών Ναυάρχων), has as its centrepiece a three-sided marble monument, with profiles of Codrington, Heyden, and De Rigny on the three sides.
Memorials to the dead of the three allies are to be found on the islands in the bay: Helonaki islet (British), Pylos islet (French), and Sphacteria island (Russian). The Russian memorial is the most impressive, consisting of a small wooden chapel in the Russian Orthodox style. Additionally, there is a memorial to the philhellene Santarosa, who was killed in an earlier battle, on the rocky shore of Sphacteria.
The battle is commemorated each year on 20 October by all day celebrations in Three Admirals' Square in Pylos, hosted by the Mayor of Pylos. The Russian, French and British governments send representatives to the ceremonies, and in the case of the Russians, a warship and its crew.
It was the source of the name for the Russian corvette Navarin and the Russian battleship Navarin.
Some bronze from the sunken Ottoman ships was bought by Anton Samassa in Trieste and was in 1834 used for the main bell of St. Judoc's Church in Sveti Jošt near Kranj, Carniola (now Slovenia).[69][70] It bears an inscription by the Slovene Romantic poet France Prešeren: "My bronze was found at the bottom of the sea, when the kingdom of Turkey was ended in Helade by Navarino. It was bought by a pilgrim; cast into a bell by Samassa, now I announce God's honour from St. Jodocus's embrasures."[69]
Table of combatant ships
| GREAT BRITAIN | FRANCE | RUSSIA | Allied Powers Total | OTTOMANS/EGYPTIANS** | Ottoman/Egyptian Total | |
|---|---|---|---|---|---|---|
| Battleships | Asia (FF) (84) Genoa (76) Albion (74) |
Breslau (84) Scipion (80) Trident (74) |
Gangut (84) Azov (F) (80) Iezekiil (80) Aleksandr Nevskii (80) |
10 (796) | Ghiuh Rewan (FF) (84) Fahti Bahri (F) (74) Burj Zafer (70) |
3 (228) |
| Frigates | Glasgow (50) Cambrian (48) Dartmouth (42) Talbot (28) |
Sirène (F)(dd) (60) Armide (44) |
Provornyi (48) Konstantin (44) Elena (38) Kastor (36) |
10 (438) | Ihsanya (dd) (64) Surya (dd) (56) Guerrière (F)(dd) (60) Leone (dd) (60) Fevz Nusrat (dd) (64) Ka'íd Zafer (dd) (64) 1 other dd 10 single-deck frigates |
17 (818) |
| Other* | 2 brigs | 2 (24) | 30 corvettes 28 brigs |
58 (1134) | ||
| Total | 9 | 5 | 8 | 22 (1258) | 78 | 78 (2180) |
Source: Compiled from information in W. James Naval History of Great Britain (London, 1837) Vol.VI, pp. 476–89.
Note Exact figures for the Ottoman/Egyptian fleet are difficult to establish. The figures given above are mainly those enclosed by Codrington in his report. These were obtained by one of his officers from the French secretary of the Ottoman fleet, a M. Leteiller. However, another report by Leteiller to the British ambassador to the Porte gives 2 more frigates and 20 less corvettes/brigs for a total of 60 warships. W. James in Naval History of Great Britain (1837) Vol. VI, p. 478, assesses the Ottomans' "effective" strength as even lower: 3 battleships, 15 large frigates and 18 corvettes, totaling just 36 ships.
Key
* Other excludes schooners, fireships and launches
Figures in brackets indicate no. of guns
FF = Flagship (Commander-in-Chief)
F = Flagship
dd = double-deck frigate
** Ottoman Empire/Egypt/Algeria/Tunisia (Ibrahim Pasha)
Capitan Bey Squadron (Alexandria): 2 battleships, 5 frigates, 12 corvettes
Moharram Bey Squadron (Alexandria): 4 frigates, 11 corvettes, 21 brigs, 5 schooners, and 5 (or 6?) fireships
Algiers Squadron: Several battleships
Tunis Squadron: 2 frigates, 1 brig
Tahir Pasha Squadron (Admiral commanding) (Constantinople): 1 battleship, 6 frigates, 7 corvettes, 6 brigs
Citations
^ A Global Chronology of Conflict: From the Ancient World to the Modern Middle ..., by Spencer C. Tucker, 2009, 1150-1151
^ A Global Chronology of Conflict: From the Ancient World to the Modern Middle ..., by Spencer C. Tucker, 2009, 1151
^ A Global Chronology of Conflict: From the Ancient World to the Modern Middle ..., by Spencer C. Tucker, 2009, 1152
^ The War Chronicles: From Flintlocks to Machine Guns: A Global Reference of ... , Joseph Cummins, 2009, p.57
^ A Global Chronology of Conflict: From the Ancient World to the Modern Middle ..., by Spencer C. Tucker, 2009, 1152
^ Runciman (1965) 29-33, 133-159
^ Woodhouse (1965) 22
^ Woodhouse (1965) 39
^ a b Dakin (1973) 142
^ Dakin (1973) 151, 174
^ Woodhouse (1965) 24
^ a b Woodhouse (1965) 108
^ Dakin (1973) 64, 144, 147
^ Dakin (1973) 142, 154
^ Dakin (1973) 143, 149
^ Dakin (1973) 148
^ Dakin (1973) 65, 153
^ Dakin (1973) 63, 147, 153
^ Dakin (1973) 153, 155, 175
^ Dakin op cit 178
^ Dakin (1973) 153, 178, 180
^ Dakin (1973) 180-1
^ Dakin (1973) 182
^ Treaty of London (1827) Article I
^ Treaty of London (1827) Article II
^ Treaty of London (1827) Additional Clause (I)
^ Treaty of London (1827) Additional Clause (II)
^ Woodhouse (1965) 32-4
^ Letter to his senior officers from Codrington Sept 8 1827 reproduced in James (1837) 473 (London, 1837)
^ Woodhouse (1965) 58-60
^ Woodhouse (1965) 56
^ Woodhouse (1965) 75-81
^ Woodhouse (1965) 82-3
^ Woodhouse (1965) 83-6
^ Report to Codrington from Capt Hamilton (HMS Cambrian), reproduced in James (1837) VI.476
^ Protocol of conference of Allied commanders 18 Oct 1827 reproduced in James (1837) VI.489
^ Codrington's report on battle to Admiralty 21 Oct 1827 reproduced in James (1837) VI.486-8
^ a b Woodhouse (1965) 28
^ Woodhouse (1965) 31
^ Woodhouse (1965) 70
^ James (1837) VI.473-89
^ Woodhouse (1965) 121
^ Woodhouse (1965) 22, 117
^ a b Woodhouse (1965) 117-8
^ Woodhouse (1965) 98
^ Codrington's report reproduced in James (1837) VI.486
^ Woodhouse (1965) 100
^ Woodhouse (1965) 106
^ James (1837) VI.483
^ a b Woodhouse (1965) 112
^ James (1837) VI.480
^ Woodhouse (1965) 114
^ Codrington's report reproduced in James (1837) VI.486-8; Dakin (1973)
^ Woodhouse (1965) 127
^ Woodhouse (1965) 119
^ Woodhouse (1965) 120
^ Codrington's report reproduced in James (1837) VI.486-8
^ Woodhouse (1965) 134
^ Woodhouse (1965) 137
^ Woodhouse (1965) 139
^ Woodhouse (1965) 139-40
^ Woodhouse (1965) 124
^ Codrington's report rep. in James (1837) VI.486-8.
^ Woodhouse (1965) 33
^ Codrington's report rep. James (1837) VI.486-8
^ Dakin (1973) 230
^ Dakin (10973) 226
^ Woodhouse (1965)
^ a b Kolar, Ivan (1957). "Literarni sprehod po delu stare Ljubljane [A Literary Walk Through a Part of the Old Ljubljana]". Jezik in slovstvo 2 (2): 297–298.
^ "Srez Kranj" [Kranj District]. Krajevni leksikon Dravske banovine [Lexicon of Place Names of the Drava Banovina] (in Slovene). Administration of the Lexicon of Place Names of the Drava Banovina. 1937. p. 402.
See also
History of Greece
Greek War of Independence
References
Dakin, D. (1973) The Greek Struggle for Independence
James, W. (1837) Naval History of Great Britain (Vol. VI)
Runciman, S. (1965) The Fall of Constantinople 1453 Cambridge University Press
Woodhouse, Christopher Montague (1965) The Battle of Navarino
Further reading
Naval wars in the Levant 1559–1853 (1952), R. C. Anderson. ISBN 1-57898-538-2
External links
Extract from W. James Naval History of Great Britain (1837) Vol VI 471-90 Includes reproduction of several original documents, esp. Codrington's own report on the battle
Aerial View of Navarino Bay
Navarino Bay (Aerial View)
Navarino with Location Map
Greek War of Independence 1821 in Art
| Ancient Greece
Science, Technology , Medicine , Warfare, , Biographies , Life , Cities/Places/Maps , Arts , Literature , Philosophy ,Olympics, Mythology , History , Images Medieval Greece / Byzantine Empire Science, Technology, Arts, , Warfare , Literature, Biographies, Icons, History Modern Greece Cities, Islands, Regions, Fauna/Flora ,Biographies , History , Warfare, Science/Technology, Literature, Music , Arts , Film/Actors , Sport , Fashion --- |
Retrieved from "http://en.wikipedia.org"
All text is available under the terms of the GNU Free Documentation License
